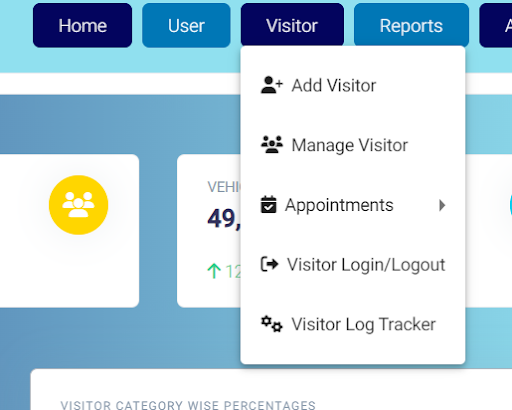
Step 1: Go to the User dashboard, click on visitors you will see a dropdown. (As shown in screen 3.3.1)
Step 2: Click on the Add Visitors, a new screen will open (as shown in screen 3.3.2).
Screen 3.3.1: Visitor Dropdown
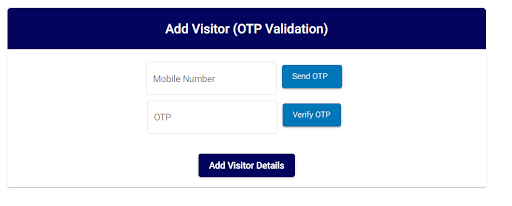
Screen 3.3.2: Add Visitor Page
Step 3: Fill the details as mentioned (in screen 3.3.2):
Mobile: Mobile number of visitors where invite code will be sent and Only numbers and maximum value 10 allowed. You don’t need to write country code i.e., +91 in case of India.
Click on Send OTP.
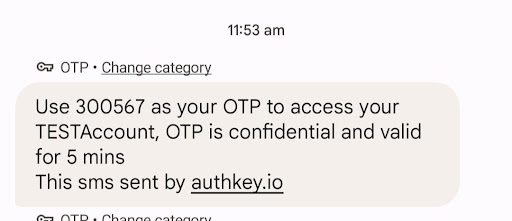
Step 4: An OTP will be sent to visitors mobile through SMS (as shown in screen 3.3.3) User is required to get the OTP and fill it in add visitor page OTP dialogue box (as shown in Screen 3.3.2) and click on verify OTP.
Screen 3.3.3: OTP SMS
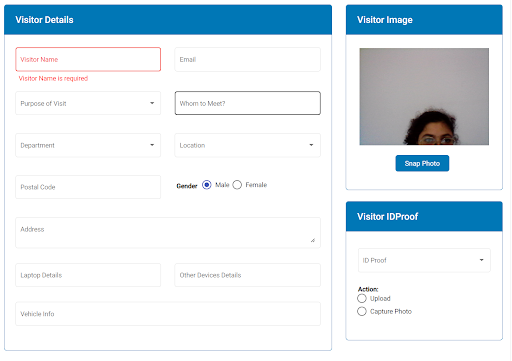
Step 5: After OTP is verified. Add Visitor Details will be enabled Click on it.
Screen 3.3.4: Add Visitor Page
Step 6: Fill the Following details:
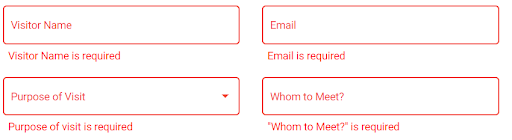
*Note: Red coloured fields are mandatory.
1. Visitor Name: Name of the visitor, and alphanumeric, and special character allowed. This field is mandatory.
2. Email: Email ID of the visitor and alphanumeric, and special character allowed. This field is mandatory.
Screen 2.3.1: User Dropdown
3. Purpose of Visit: The Visitors Purpose visit must be mentioned here, and alphanumeric, and special character allowed. This field is mandatory.
4. Whom to Meet:The Person who visitor has come to visit, and alphanumeric, and special character allowed. This field is mandatory.
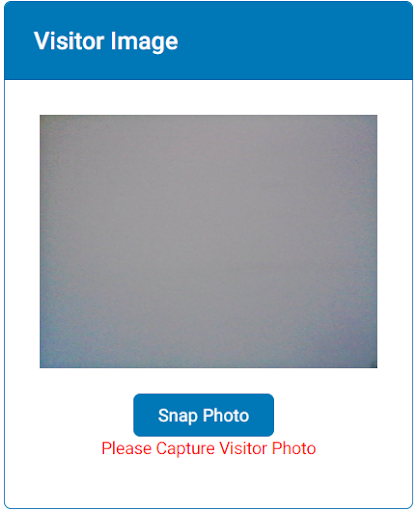
5. Visitor Image: Visitors Image is Captured here. This field is mandatory.
Screen 3.3.7: Mandatory Field
Screen 3.3.6: Mandatory fields
Screen 3.3.8: Mandatory Field
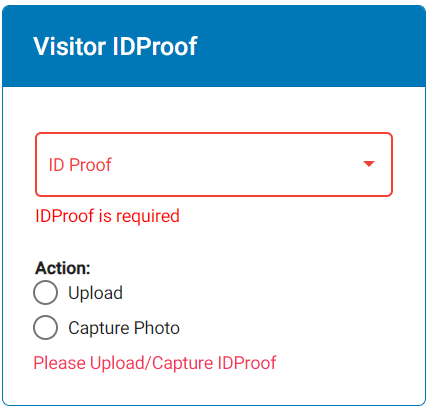
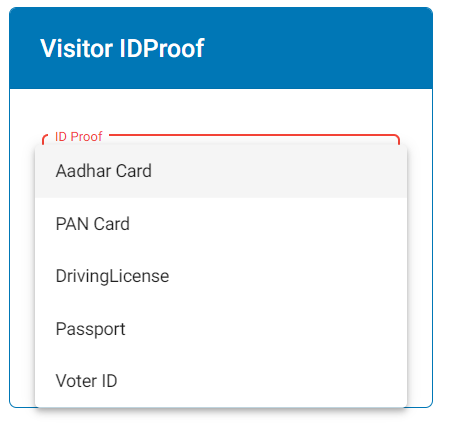
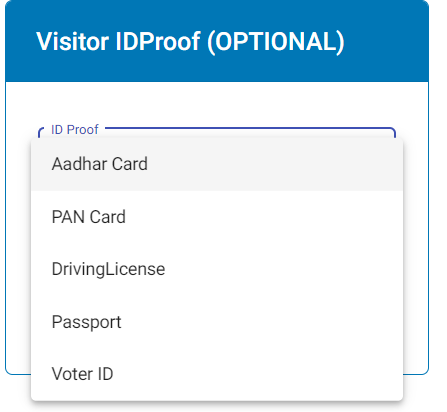
6. Visitor ID Proof:Visitor ID Proof is selected in drop down and file is uploaded through scanning or file upload. This field is mandatory.
7. Department: Choose which department the Person visitor wants to meet belongs to.
8. Location: Choose the location where visitor will meet the Person.
9. Postal code:Postal code of area from visitor belongs to and only numbers are allowed, and limit is 6.
10. Gender: Choose the gender of visitor whether he/she is male or female
11. Address: Address of the visitor, and alphanumeric, and special character allowed.
12. Laptop Details: Whether visitor has brought a laptop, and alphanumeric, and special character allowed.
13. Other Device Details: Whether visitor has other devices on him, and alphanumeric, and special character allowed.
14. Vehicle Info: Visitors vehicle number, and alphanumeric, and special character allowed.
Step 7: After all the mandatory and nonmandatory fields are filled Click on Submit to create the visitor request.
Appintment/Pre-Booking
Creating Visitor appointment:
Option 1: Self appointment by admin.
Follow the steps:
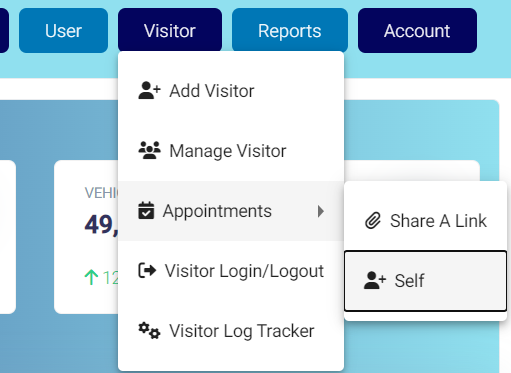
Step 1: Go to the User dashboard, click on visitors you will see a dropdown (as shown in screen 3.4.1).
Step 2: Go to Appointments Click on Self, a new screen will open (as shown in screen 3.4.1).
Screen 3.4.1: Visitor Dropdown
Screen 3.4.2: Self Appointment Page
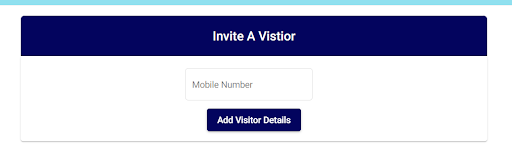
Step 3: Enter visitor Phone number and click on Add visitor Details. (As shown in 3.4.2)
Screen 3.4.2: Self Appointment Page
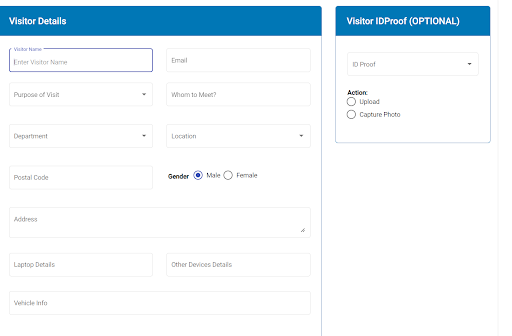
Step 4: Fill the Following details. (As shown in screen 3.4.3)
*Note: Red coloured fields are mandatory.
1. Visitor Name:Name of the visitor, and alphanumeric, and special character allowed. This field is mandatory.
2. Email: Email ID of the visitor and alphanumeric, and special character allowed. This field is mandatory.
Screen 3.4.4: Mandatory fields 1
3. Purpose of Visit:The Visitors Purpose visit must be mentioned here, and alphanumeric, and special character allowed. This field is mandatory.
4. Whom to Meet:The Person who visitor has come to visit, and alphanumeric, and special character allowed. This field is mandatory.
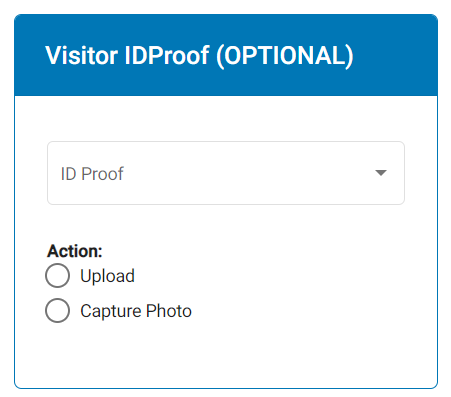
Screen 3.4.5: ID proof
Screen 3.4.6: ID proof Dropdown
Non mandtory fields.
Visitor ID Proof: Visitor ID Proof is selected in drop down and file is uploaded through scanning or file upload.
Department: Choose which department the Person visitor wants to meet belongs to.
Location: Choose the location where visitor will meet the Person.
Postal code:Postal code of area from visitor belongs to and only numbers are allowed, and limit is 6.
Gender: Choose the gender of visitor whether he/she is male or female
Address: Address of the visitor, and alphanumeric, and special character allowed.
Laptop Details: Whether visitor has brought a laptop, and alphanumeric, and special character allowed.
Other Device Details: Whether visitor has other devices on him, and alphanumeric, and special character allowed.
Vehicle Info: Visitors vehicle number, and alphanumeric, and special character allowed.
Step 7: After all the mandatory and nonmandatory fields are filled Click on Submit to create the visitor Appointment.
Option 2: Appointment link being shared to visitor.
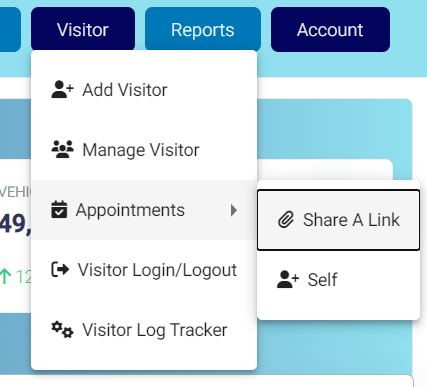
Step 1: Go to the User dashboard, click on visitors you will see a dropdown (as shown in screen 3.4.7).
Step 2: Go to Appointments Click on Share A Link, a new screen will open (as shown in screen 3.4.8).
Screen 3.4.7: Visitor Dropdown
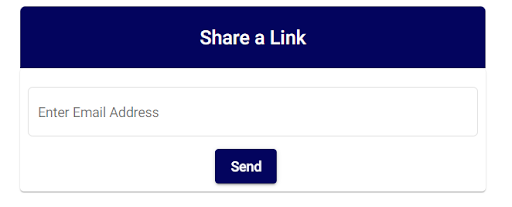
Screen 3.4.8: Share A Link Page
**Note: To share to multiple emails separate them with semi-column.
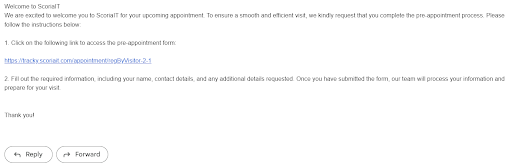
Step 3: Enter Visitor Email ID to share a link with him to register his appointment for his visit.
Screen 3.4.9: Email sent via Share A Link to visitor
Approve/Reject Visitor
After Creating Visitor request It must either approve/ reject or Re-approve/ Re-reject Visitor request.
*Note: Re-Approve/ Re-Reject Action can be performed only by Security head.
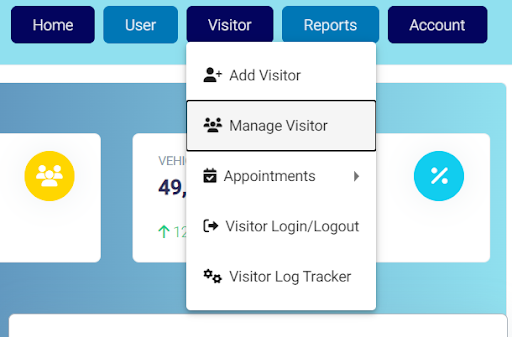
Screen 3.3.1: Visitor Dropdown
Step 1: Click on Visitor. You will dropdown select Manage Visitor (as shown in screen 3.3.1).
Step 2: Click on Manage Visitor. You will see a screen (as screen 3.3.2).
Screen 3.3.2: Visitor Dropdown
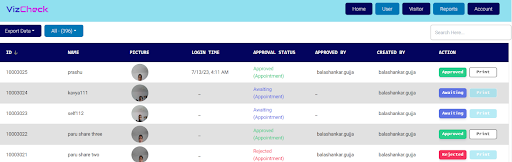
Step 3: The Page consists of information About Visitor
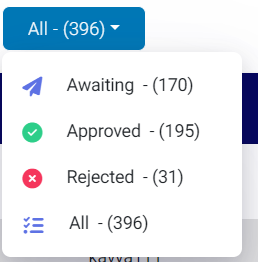
The SH/SO/Admin can filter the data to show either Approved list/Awaiting list/Rejected list/ All.
Screen 3.3.3: Filter
2. Grid Features: Export, Filter, Sort are made available to SH/SO/Admin.
**Note: Print will be enabled only on approval of visitor request.
Awaiting Visitor Request:
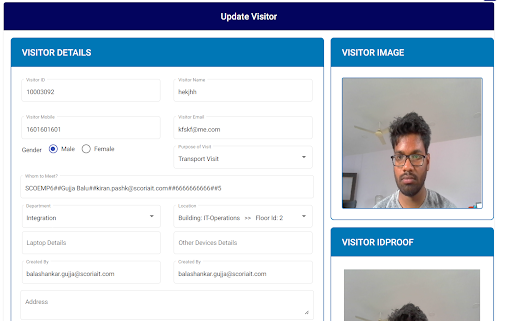
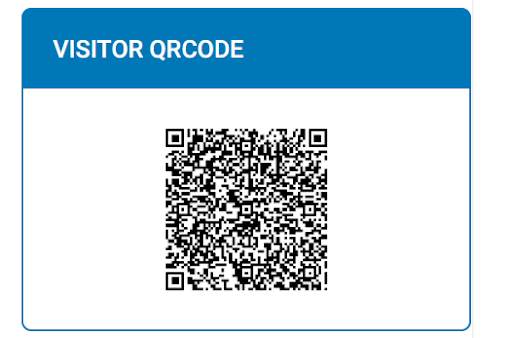
Step 1: Click on any Awaiting visitor request to either update/approve/reject. Update Visitor Page will open as shown in screen 3.3.4. It will also have QR code as shown in screen 3.3.5.
Screen 3.3.4: Update Visitor Page
Screen 3.3.5: QR code
Step 2: The user can Check the visitor details and can modify if any changes are there.
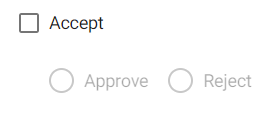
Step 3: If User is okay with Visitor Details, he can select the accept box as shown in screen 3.3.6.
Step 4: Now Approve, Reject Options are enabled select one of those.
Step 5: After selecting between Approve/ Reject the User need to click on Approve/Reject to change the status of Visitor request.
Screen 3.3.6: Accept option
Screen 3.3.7: Approve/ Reject
Step 6: Once a visitor request is approved, Print functionality can be used to generate visitor e-card. (As shown in below screen)
***Note: Ecofriendly alternative visitor receives e-card link through SMS/Email notification in order to avail OR code login.
Action: Re-Approve or Re-Reject visitor Request.
**Note: Print will be enabled only on approval of visitor request.
Approve/Reject (Security Head):
Step 1: Click on Awaiting. Update Visitor Page will open as shown in screen 3.3.8. It will also have QR code as shown in screen 3.3.9.
Screen 3.3.8: Update Visitor Page
Screen 3.3.8: Update Visitor Page
Step 2: The user can Check the visitor details and can modify if any changes are there.
Step 3: If User is okay with Visitor Details, he can select the accept box as shown in screen 3.3.10.
Step 4: Now Approve, Reject Options are enabled select one of those.
Step 5: After selecting between Approve/ Reject the User need to click on Update Visitor to change the status of Visitor request.
Screen 3.3.10: Accept option
Screen 3.3.11: Update Visitor
Visitor Status Log Tracker
Users can Track the Status of Visitor in premises.
Follow these steps:
*Note: Mandatory fields are in red colour.
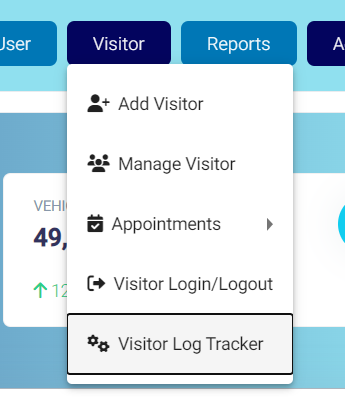
Step 1: Go to the menu bar, click on visitors you will see a dropdown (as shown in screen 3.4.1).
Step 2: Click on Visitor Log Tracker, a new screen will open (as shown in screen 3.4.2).
Screen 3.4.1: Visitor Dropdown
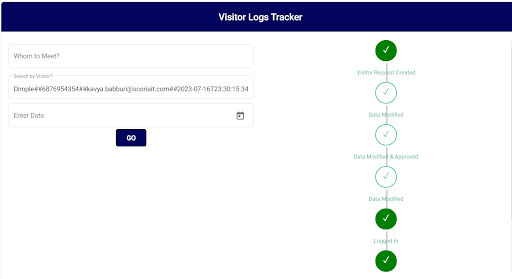
Screen 3.4.2: Visitor Log Tracker Page
Step 3: After filling the details in screen 3.4.2. The screen 3.4.3 Shows a Comprehensive visitor status track log.
Screen 3.4.2: Visitor Log Tracker Page
Whom to meet: Name of Person visitor has come to visit.
Search by Visitor:Name of Visitor. This field is mandatory.
Enter Date: Date of Visit on which log is require.
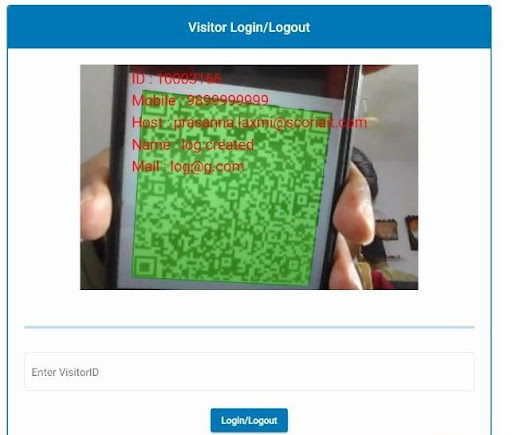
Visitor Login/Logout
Visitor can login/logout as follows:
***Note: A visitor can Login/Logout through QR code Scanning/ Visitor ID.
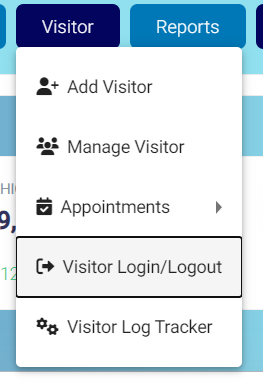
Step 1: Go to the menu bar, click on visitors you will see a dropdown (as shown in screen 3.5.1).
Step 2: Click on Visitor Login/Logout, a new screen will open (as shown in screen 3.5.2).
Screen 3.5.1: Visitor Dropdown
Step 3: Visitor can scan the QR code/Visitor ID as shown in screen 3.5.2 and click on login/logout.